
Deploy React WeatherApp to AKS using ACR
This blog provides a step-by-step guide on how to deploy your React Weather App to Azure Kubernetes Service (AKS) using Azure Container…
- kubernetes
- docker
- azure
This blog provides a step-by-step guide on how to deploy your React Weather App to Azure Kubernetes Service (AKS) using Azure Container Registry (ACR). The guide is designed to be beginner-friendly and includes detailed instructions and code snippets to help you set up your AKS cluster, containerize your app, and deploy it to AKS using ACR. With this guide, you can easily deploy your React Weather App to AKS and make it available to your users with high availability and scalability.
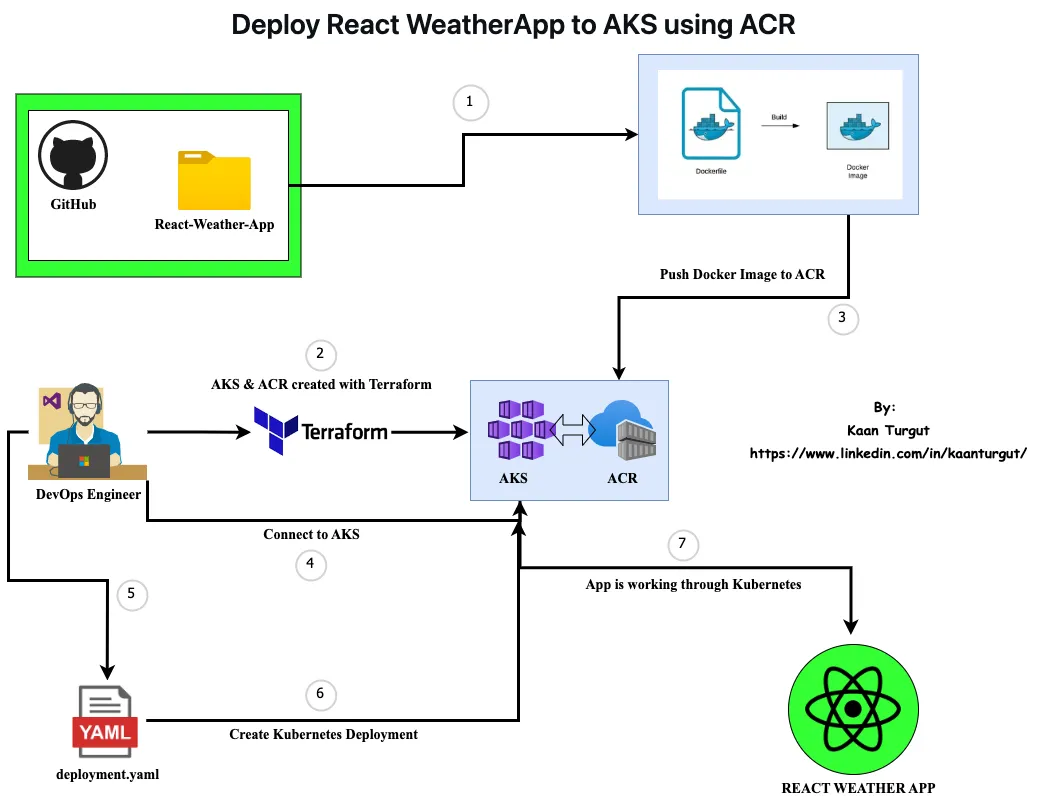
This is the summary of the steps that we will go over in this tutorial:
- Build Docker Image with Dockerfile
- Create Azure Container Registry (ACR) by TERRAFORM
- Create Azure Kubernetes Services (AKS) by TERRAFORM.
- Push the image into ACR registry
- Create Deployment and Service ( yaml file )
Lets Get Started!
Build a Docker Image
- Create a Dockerfile with the following content;
FROM node:14

WORKDIR /app

COPY package*.json ./

RUN npm install

COPY . .

EXPOSE 3000

CMD [ "npm", "start" ]- In order to build the image;
docker build -t IMAGE_NAME .Create ACR and AKS with Terraform
To provision the resources
terraform apply -var-file="dev.tfvars"Azure Kubernetes Cluster (AKS)
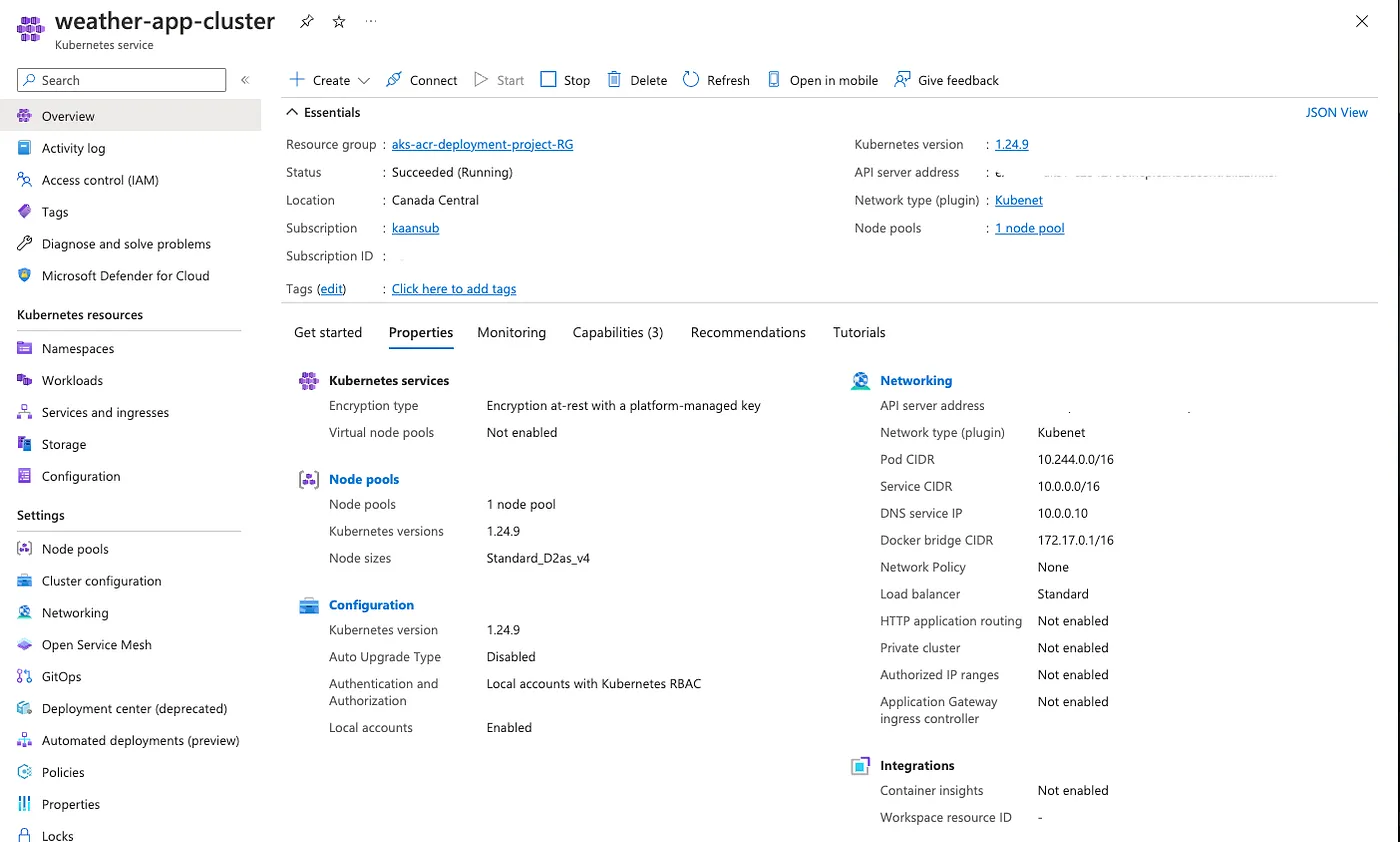
Azure Container Registry (ACR)

Deep Note :
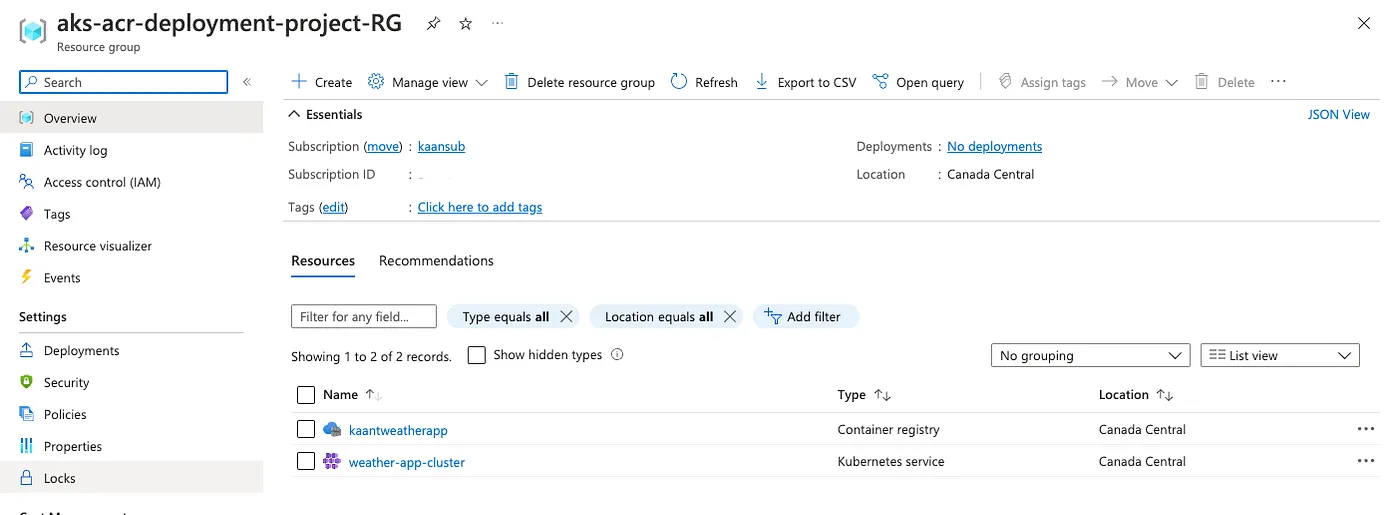
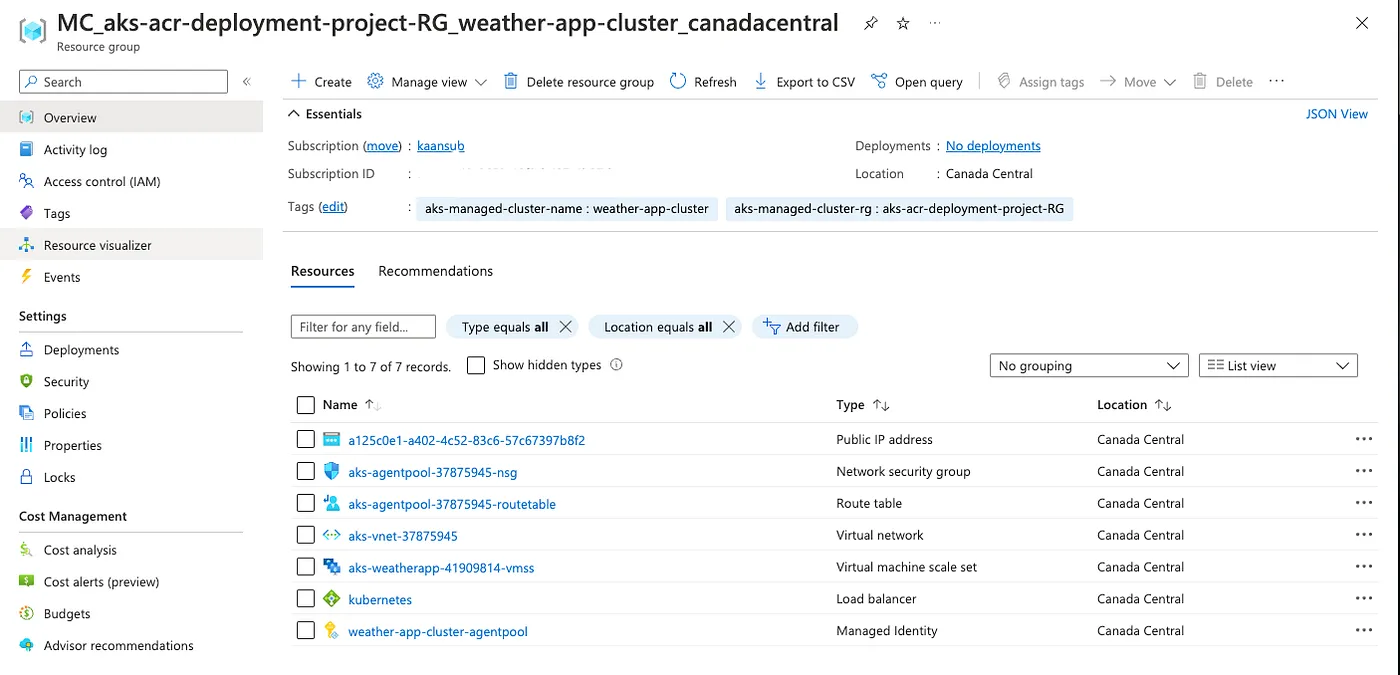
- Once Azure Kubernetes Cluster is created , Azure automaticly creates another resource group starts with “MC” to put the components of the cluster in.But puts the Kubernetes Service itself inside the resource group that we created.
Resource Group that I created
Resource Group that AZURE created
Connect to Azure Kubernetes Cluster
- In order to connect to the cluster, click Connect , copy and paste the following commands to your terminal.
az aks get-credentials --resource-group aks-acr-deployment-project-RG --name weather-app-cluster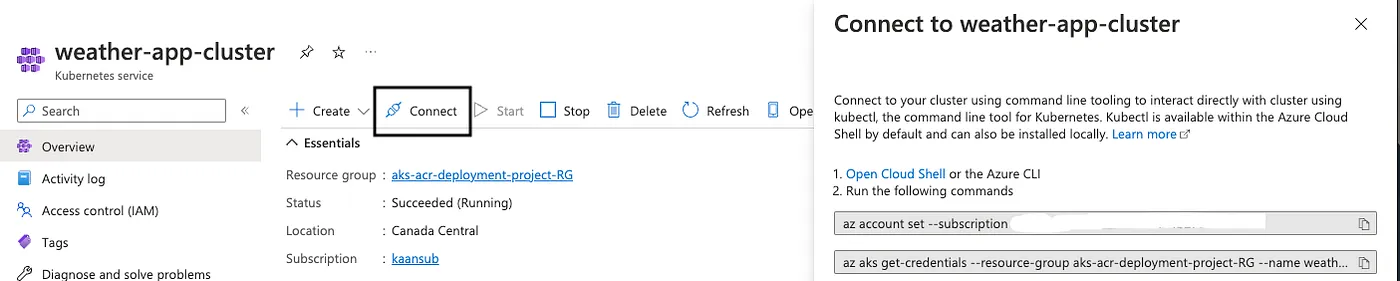
- Once you connected to the cluster , you can verify and see the node by doing;
kubectl get nodes 
- It is time to login to the ACR and push the image
Login to ACR by doing;
az acr login --name ACR_NAME
- In order to push the image , firt tag (rename) the image by doing;
docker tag CURRENT_IMAGE_NAME ACR_LOGINSERVER/IMAGE_NAME:TAG
- Push the image to the ACR by doing;
docker push ACR_LOGINSERVER/IMAGE_NAME:TAG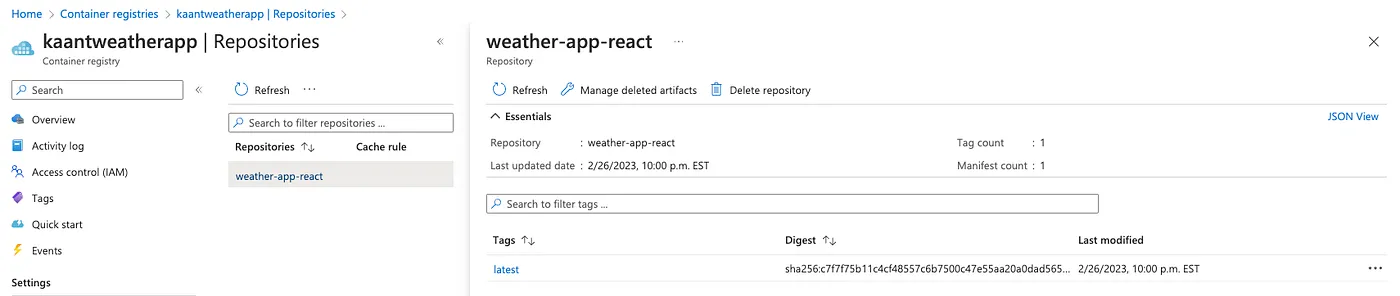
Create a yaml file for creating a Deployment and a Service. Content should be like;
apiVersion: apps/v1
kind: Deployment
metadata:
  name: weather-app-deployment
spec:
  replicas: 3
  selector:
    matchLabels:
      app: weather-app
  template:
    metadata:
      labels:
        app: weather-app
    spec:
      containers:
      - name: weather-app-container
        image: kaantweatherapp.azurecr.io/weather-app-react:latest
        resources:
          limits:
            cpu: 1
            memory: 1Gi
          requests:
            cpu: 500m
            memory: 500Mi
        ports:
        - containerPort: 3000
---

apiVersion: v1
kind: Service
metadata:
  name: weather-app-service
spec:
  selector:
    app: weather-app
  ports:
    - name: http
      protocol: TCP
      port: 80
      targetPort: 3000
  type: LoadBalancer
Create the Deployment and Service
- In order the create the Deployment and the Service from the YAML file;
kubectl create -f NAME_OF_THE_FILE.yaml
- Check out the pods , deployment and the service.
In order to access the app , open the EXTERNAL-IP of the Service
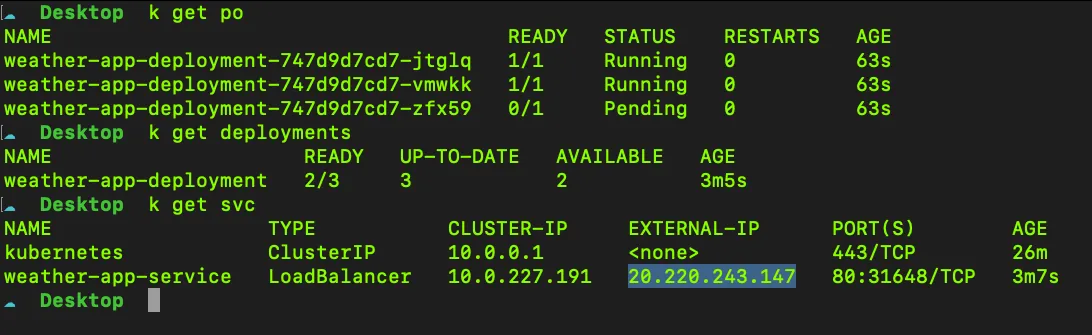
APP IS WORKING THROUGH AZURE KUBERNETES SERVICE
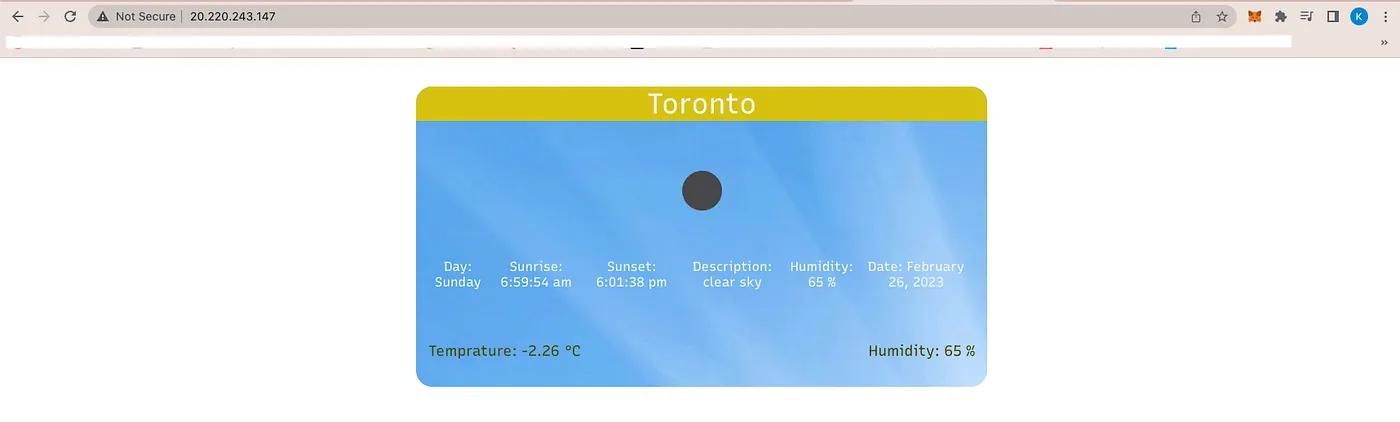
Developer of the App : Hamza KOC